- Measure The Deck Railing
- Calculate Cable Length and Hardware Quantity
- Order Materials
- Order Tools
- Drill Holes in Posts
- Crimping Cables
- Install Cables (loose)
- Reinforce Posts and Hand Railing
- Tighten Cables
Step 1: Measure the total length of the deck railing to be installed. Enter the length into the calculator below.
Step 2: Measure the height between the deck surface and the bottom of the hand railing. Enter the height into the calculator below.
Step 3: Count the number of end posts. End posts are where a run of cables terminates.
Step 4: Count the number of corner posts. Corner posts are where two runs of cables intersect. Both runs will terminate at that post.
Step 5: Count the number of posts at the top and bottom of a stair railing. These will need special angled washers.
Optional, But Nice.
Step 6: Do you want to add washers at each post where the cable passes through the post? These improve the appearance, and also protect the wood posts from wear. Count the number of posts through which cables will pass through, but not terminate. These are the posts between the corners and end posts.
Step 7: Do you want to add washers at each stair railing post that the cables pass through? Count the number of stair railing posts through which the cables pass but do not terminate.
Once you have all your measurements, use this stainless steel railing calculator to easily figure out the length of the cable that you will need, and the quantity of all the pcs of hardware. When you are ready to order, there are links above the qty of each material for your convenience.
Once the length of the cable and the number of hardware pieces needed has been calculated, it’s time to order all the material.
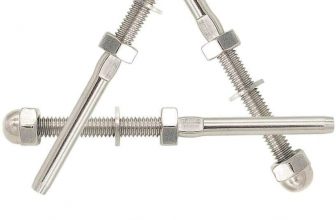
The following post details all the materials and hardware that must be ordered to complete the stainless cable deck railing install.
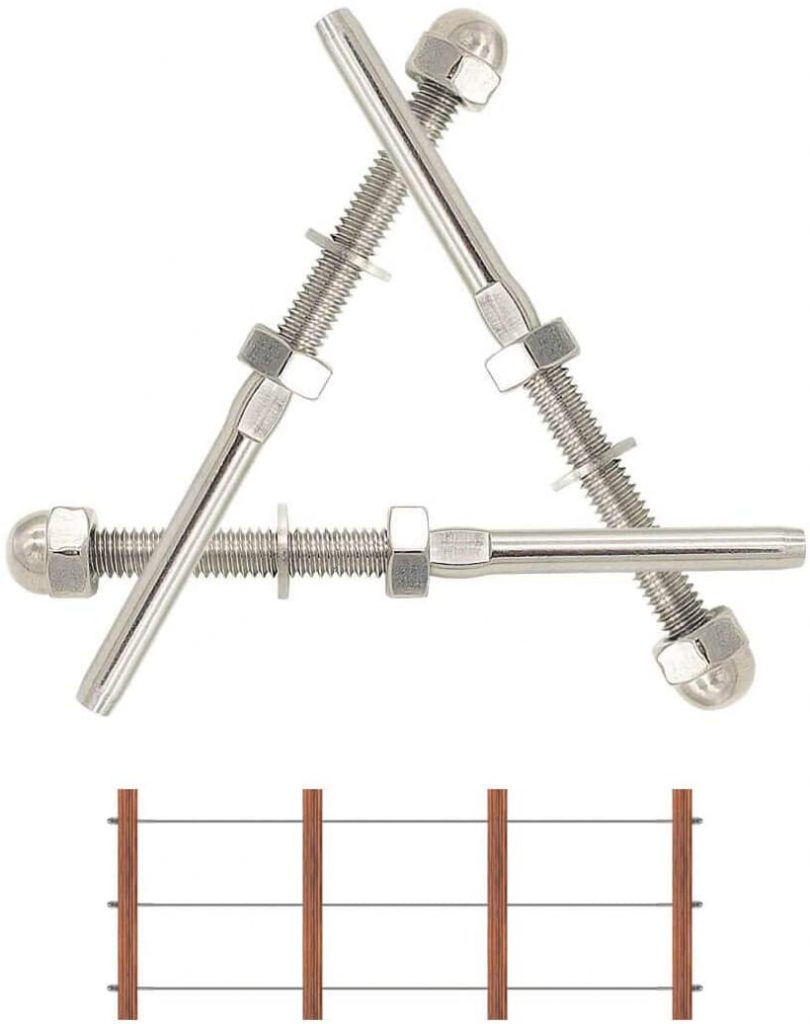
Order Materials and Hardware For Stainless Deck Railing With Wood Posts
After you have taken your deck measurements and calculated the length of cable and quantity of hardware you need, it’s time to order the materials and hardware. Watch this video to see an overview of the hardware required for the cable railing install….
Titan 11980 Hydraulic Cable Crimper

This tool comes with a large set of dies since it is sold as a general-purpose hydraulic crimper. Stainless cable crimping will only require one size die. Having the extra dies means that once the stainless cable railing project is complete, the crimper can be used in the future for crimping electrical connectors and swaging cables.
Cable railing retailers will rent crimpers, but the rental cost is as much as buying this tool.
The following post has a full review of this crimper including some modifications that make it easier to use. There’s also a comparison to other crimper options.
Cable Cutters

Most of the cable sellers on Amazon are trying to sell the small cable cutters, like these: https://amzn.to/2WKvcHA However, I found using the small cutters to be very difficult to cut the 1/8in 1×19 cable without pinching and smashing fingers. The larger strands of the 1×19 cable make it more difficult to cut. Once I switched to an 18in cable cutter, it was super easy to cut the 1/8in diameter cable. Therefore, I would recommend the larger 13″ to 18″ cutters, like these:
(Buy it on Amazon)
These are additional tools that are used to drill the wood posts. Details can be seen in this video Pt.3: https://youtu.be/4faByj5kgYA
– Wolfcraft 4525404 Multi-Angle Drill Guide: Buy it on Amazon
– IRWIN QUICK-GRIP Bar Clamp, One-Handed, Medium-Duty, 12-Inch: Buy it on Amazon
– Ryobi 18V Cordless Brushless Drill: Buy it on Amazon
Medium drill bit
– 1/4in Diameter by 12in Long Drill Bit – A standard drill bit can barely make it through a 4in post. The longer drill bit is neccessary when drilling at an angle, like for posts on the staircase.